
Getting Started
This is a basic description of the steps needed to submit a project for booking to the Energy API. For more detailed information, please refer to the API documentation.
Project Template
Section titled “Project Template”If you are using TypeScript we recommend downloading our project template which makes it quick and easy to get up and running on this API. This template includes a generated client SDK with rich typing to make navigating and calling the API simple.
Set up
Section titled “Set up”You need to acquire an access token. This token should be cached and used for the lifetime of that
token. This can be determined by using the exp claim in the token itself. See the environment guide
for information and authUrl and baseUrl.
Request
Section titled “Request”import fetch from 'node-fetch';
const response = await fetch(`${authUrl}`, { method: 'POST', body: JSON.stringify({ username: 'string', password: 'string', }), headers: { 'Content-Type': 'application/json' },});
const accessToken = await response.json();Result
Section titled “Result”access_token;Subscribe to events
Section titled “Subscribe to events”Palmetto offers a suite of webhooks that allow you to be alerted to status changes to your projects automatically. For more information, refer to the subscription documentation.
Reference: Subscription API
Get the Palmetto service area for a location
Section titled “Get the Palmetto service area for a location”Check to see if Palmetto services the area and the utility. Make a call to the service area endpoint, passing in latitude, longitude, and postal code, to get a list of utilities that Palmetto supports.
Request
Section titled “Request”import fetch from 'node-fetch';
const postalCode = '02908';const lat = '41.85205806726778';const lon = '-71.43945851226846';
const response = await fetch(`${envBaseUrl}/api/service-area?lat=${lat}&lon=${lon}&postalCode=${postalCode}`, { method: 'GET', headers: { Accept: 'application/json', Authorization: `Bearer ${accessToken}`, },});
const serviceAreaUtilities = await response.json();Response
Section titled “Response”{ name: 'Rhode Island', coordinates: { lat: 41.601439, lon: -71.46297087752808 }, supportedUtilities: [ ..., { name: 'Rhode Island Energy (formerly National Grid - Rhode Island)', lseId: 507, rates: [ ..., { name: "Residential", masterTariffId: 859, tariffId: 3445715, availability: { availableFrom: "2023-07-01T00:00:00.000Z", available: true } }, ... ] }, ... ]}Reference: Service Areas API
Get a list of components
Section titled “Get a list of components”When submitting a project you need to list the components that are being installed by their SKUs. You can get this list
from our products endpoint. If you use Aurora for your designs, we have included
an attribute on each product with the key auroraId that you can use to match a component in aurora to the SKU in our system. You should
consider caching this list for an extended period of time as the product list does not change frequently.
Request
Section titled “Request”import fetch from 'node-fetch';
const response = await fetch(`${envBaseUrl}/api/products`, { method: 'GET', headers: { Accept: 'application/json', Authorization: `Bearer ${accessToken}`, },});
const products = (await response.json()).data;const mapping = products ?.map((p) => ({ sku: p.sku, name: p.name, auroraId: p.attributes?.find((a) => a.key === 'auroraId')?.value, })) .filter((p) => p.auroraId);Response
Section titled “Response”{ data: [ ..., { id: "63f2898ad2d53c9e6465a656", sku: "canadianSolar-cs3n395ms", name: "Canadian Solar CS3N-395MS 395w", manufacturer: "Canadian Solar", shortDescription: "395W All Black Module", longDescription: "Canadian Solar CS3N-395MS, 395W BOB 66C 35MM", type: "simple", classificationId: "63f27056245f32be8c8f64a3", availability: { available: true }, restrictions: { financiers: [], states: [], systemSize: [] }, attributes: [ { key: "auroraId", value: "c0095004-109c-4feb-8813-0fbaab1107bd" } ] }, ... ]}Reference: Products API
Create a project
Section titled “Create a project”Once you are ready to submit a project, for palmetto to fulfill, the first step is to create a project. You can think of a project as a container for all of the information about the system that you are submitting. This includes the design, estimates, documents, etc. You may create a project with the minimum information required see the schema and update it as the customer progresses through your system, or you may create a project with all of the information. This affords you the flexibility to support your business process.
Request
Section titled “Request”import fetch from 'node-fetch';
const body = { name: 'My Project', type: 'SOLAR_RESIDENTIAL', externalId: 'external-id-123', address: { streetAddress: '20933 Roscoe Blvd', locality: 'Canoga Park', region: 'MA', postalCode: '02779', country: 'US', coordinates: { lat: -71.0952744, lon: 41.8718583, }, }, contacts: [ { tags: ['OWNER'], firstName: 'Maynard', middleName: 'Percy', lastName: 'Crown', phones: [ { tags: ['MOBILE'], number: '+18048675309', }, ], locale: 'en-US', }, ], design: { provider: 'AURORA', providerReferenceId: 'aurora-id', tsrf: 0.85, firstYearProductionKwh: 7409, components: [ { name: 'Enphase IQ 8 Plus Microinverter', sku: 'iq8-plus', quantity: 1, }, { name: 'Canadian Solar CS3N-395MS 395w', sku: 'canadianSolar-cs3n395ms', quantity: 13, }, ], arrays: [ { sizeW: 400, moduleQuantity: 1, tilt: 14, azimuth: 221, tsrf: 0, systemLosses: 0, firstYearProductionKwh: 0, }, { sizeW: 400, moduleQuantity: 3, tilt: 14, azimuth: 221, tsrf: 0, systemLosses: 0, firstYearProductionKwh: 0, }, { sizeW: 400, moduleQuantity: 2, tilt: 14, azimuth: 131, tsrf: 0, systemLosses: 0, firstYearProductionKwh: 0, }, { sizeW: 400, moduleQuantity: 3, tilt: 14, azimuth: 131, tsrf: 0, systemLosses: 0, firstYearProductionKwh: 0, }, { sizeW: 400, moduleQuantity: 4, tilt: 14, azimuth: 41, tsrf: 0, systemLosses: 0, firstYearProductionKwh: 0, }, ], }, estimate: { dealerFee: 0.25, lineItems: [ { name: 'Solar System', sku: 'pv-residential', quantity: 5200, units: 'WATT', unitNetPrice: 3.6, netPrice: 18720, }, { name: 'Palmetto Protect Essentials', sku: 'palmetto-protect-essentials', quantity: 1, units: 'OTHER', unitNetPrice: 150, netPrice: 150, }, ], }, paymentMethods: [ { type: 'PPA', amount: 18720, provider: 'PALMETTO', providerReferenceId: '64a822dd2238174defd6b09c', }, ],};
const response = await fetch(`${envBaseUrl}/api/projects`, { method: 'POST', headers: { Accept: 'application/json', 'Content-Type': 'application/json', Authorization: `Bearer ${accessToken}`, }, body: JSON.stringify(body),});const project = await response.json();Response
Section titled “Response”{ status: 'DRAFT', id: '64cd33c08697c006a821fccc', name: 'My Project', type: 'SOLAR_RESIDENTIAL', contacts: [ { firstName: 'Maynard', middleName: 'Percy', lastName: 'Crown', phones: [ { tags: ['MOBILE'], number: '+18048675309', }, ], locale: 'en-US', id: '64cd33c08697c006a821fccd', tags: ['OWNER'] } ], address: { streetAddress: '20933 Roscoe Blvd', locality: 'Canoga Park', region: 'MA', postalCode: '02779', country: 'US', coordinates: { lat: -71.0952744, lon: 41.8718583 } }, design: { id: '64cd33c08697c006a821fcce', arrays: [ { sizeW: 400, moduleQuantity: 1, tilt: 14, azimuth: 221, tsrf: 0, systemLosses: 0, firstYearProductionKwh: 0, }, { sizeW: 400, moduleQuantity: 3, tilt: 14, azimuth: 221, tsrf: 0, systemLosses: 0, firstYearProductionKwh: 0, }, { sizeW: 400, moduleQuantity: 2, tilt: 14, azimuth: 131, tsrf: 0, systemLosses: 0, firstYearProductionKwh: 0, }, { sizeW: 400, moduleQuantity: 3, tilt: 14, azimuth: 131, tsrf: 0, systemLosses: 0, firstYearProductionKwh: 0, }, { sizeW: 400, moduleQuantity: 4, tilt: 14, azimuth: 41, tsrf: 0, systemLosses: 0, firstYearProductionKwh: 0, }, ], components: [ { name: 'Enphase IQ 8 Plus Microinverter', sku: 'iq8-plus', quantity: 1, }, { name: 'Canadian Solar CS3N-395MS 395w', sku: 'canadianSolar-cs3n395ms', quantity: 13, }, ], firstYearProductionKwh: 7409, provider: 'AURORA', providerReferenceId: 'aurora-id', tsrf: 0.85 }, estimate: { dealerFee: 0.25 "totalAdjustments": [ { "name": "Dealer fee", "isCalculated": true, "rate": 0.25, "amount": 10450.16, "type": "DEALER_FEE" } ] "totalNetPrice": 19326, "totalGrossPrice": 29776.16, lineItems: [ { "sku": "pv-residential", "name": "Solar System", "quantity": 5200, "units": "WATT", "netPrice": 18720, "grossPrice": 29018.75, "unitNetPrice": 3.6, "unitGrossPrice": 5.5805, "adjustments": [ { "name": "Dealer fee", "isCalculated": true, "rate": 0.25, "amount": 10298.75, "type": "DEALER_FEE" } ] }, { "name": "Palmetto Protect Essentials", "sku": "palmetto-protect-essentials", "quantity": 1, "units": "OTHER", "netPrice": 150, "grossPrice": 187.48, "unitNetPrice": 150, "unitGrossPrice": 187.48, "adjustments": [ { "name": "Dealer fee", "isCalculated": true, "rate": 0.25, "amount": 37.47999999999999, "type": "DEALER_FEE" } ] } ] }, paymentMethods: [ { type: 'PPA', amount: 18720, provider: 'PALMETTO', providerReferenceId: '64a822dd2238174defd6b09c' } ], documents: [], owner: { teamId: '5e9dd0997f5ed3003b24fc77', userId: 3753 }}Reference: Project Create API
In the portal
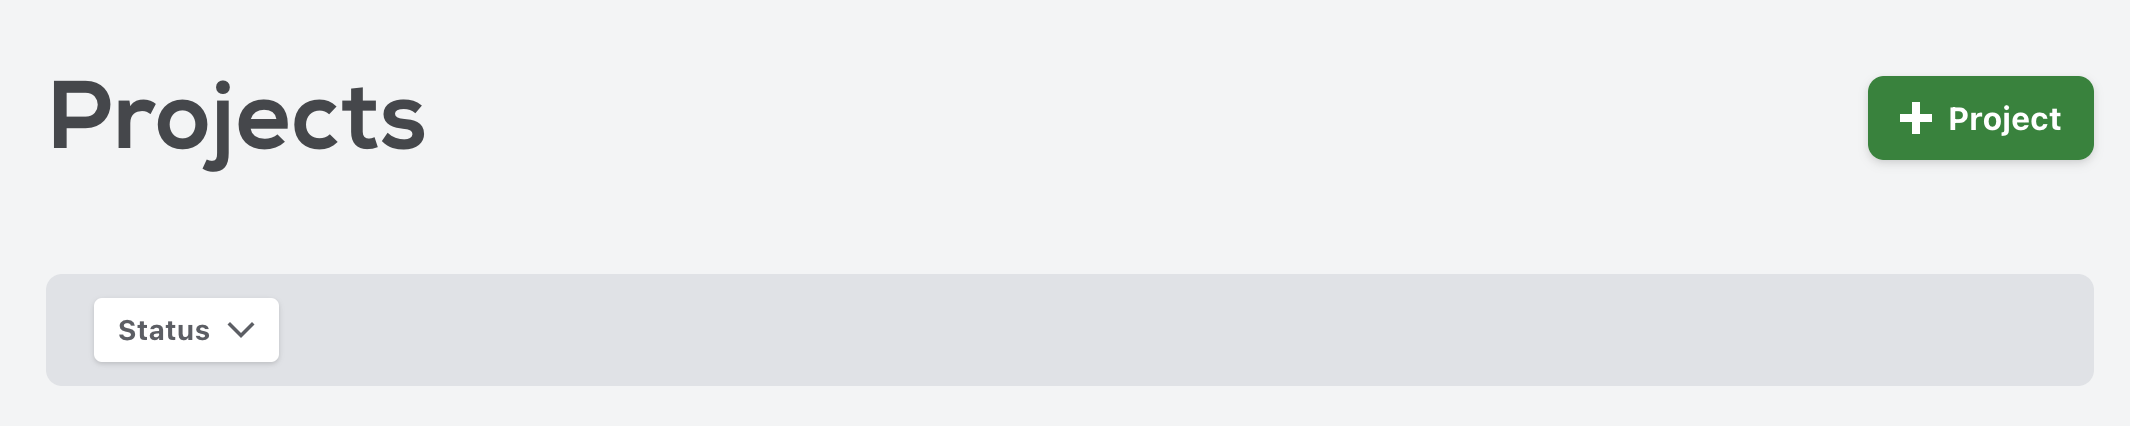
Section titled “In the portal”You can fully submit a project via the portal. You can add a project from the Projects list using the + Project button:
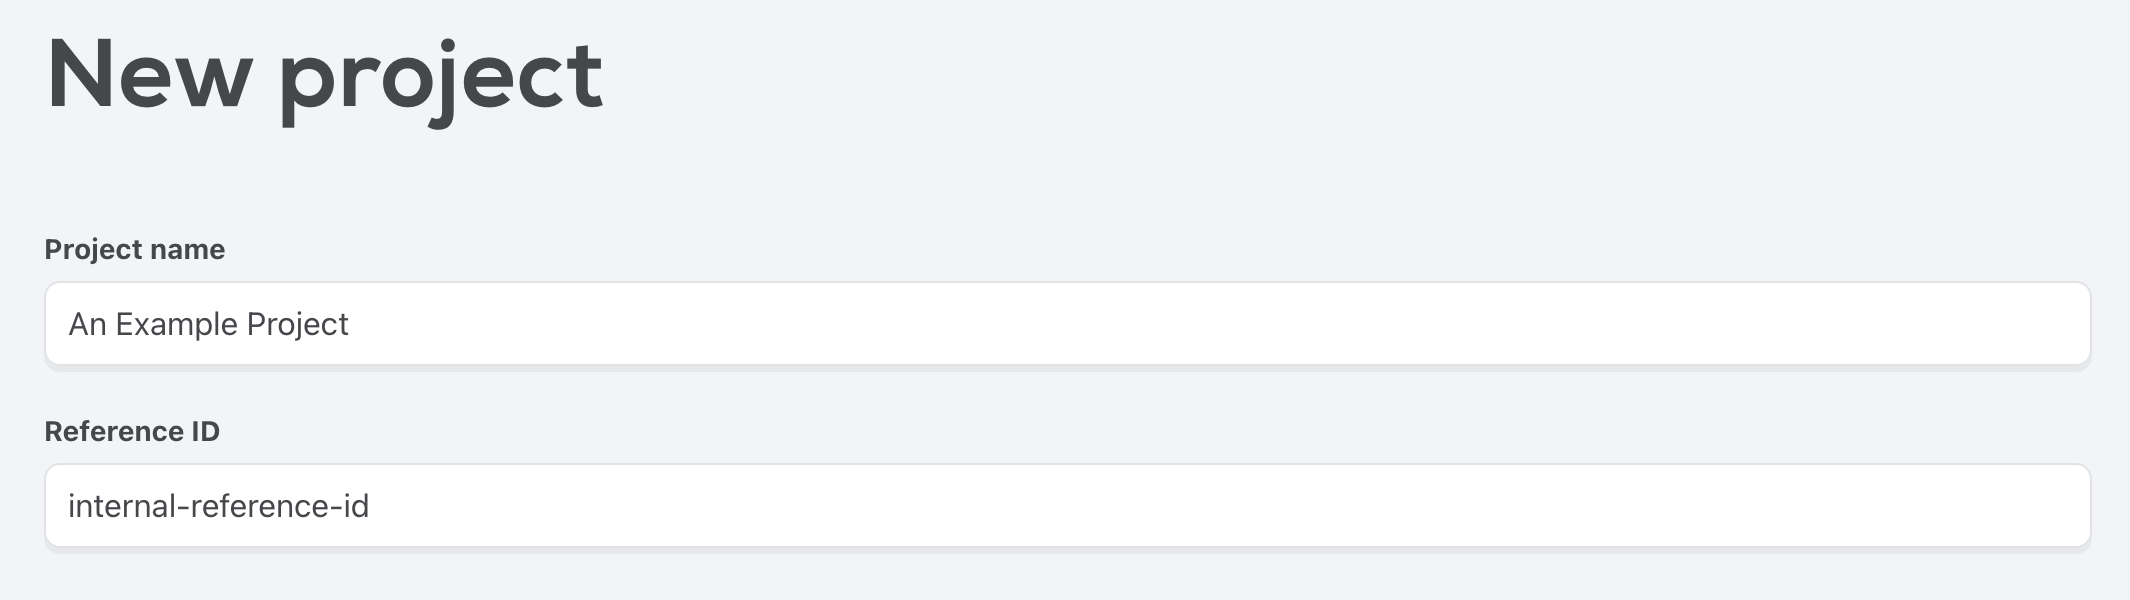
The New project form accepts all of the same data required via the API, broken into sections. To start, give your project a name and a reference identifier (this is usually an id that you use internally to identify a project).
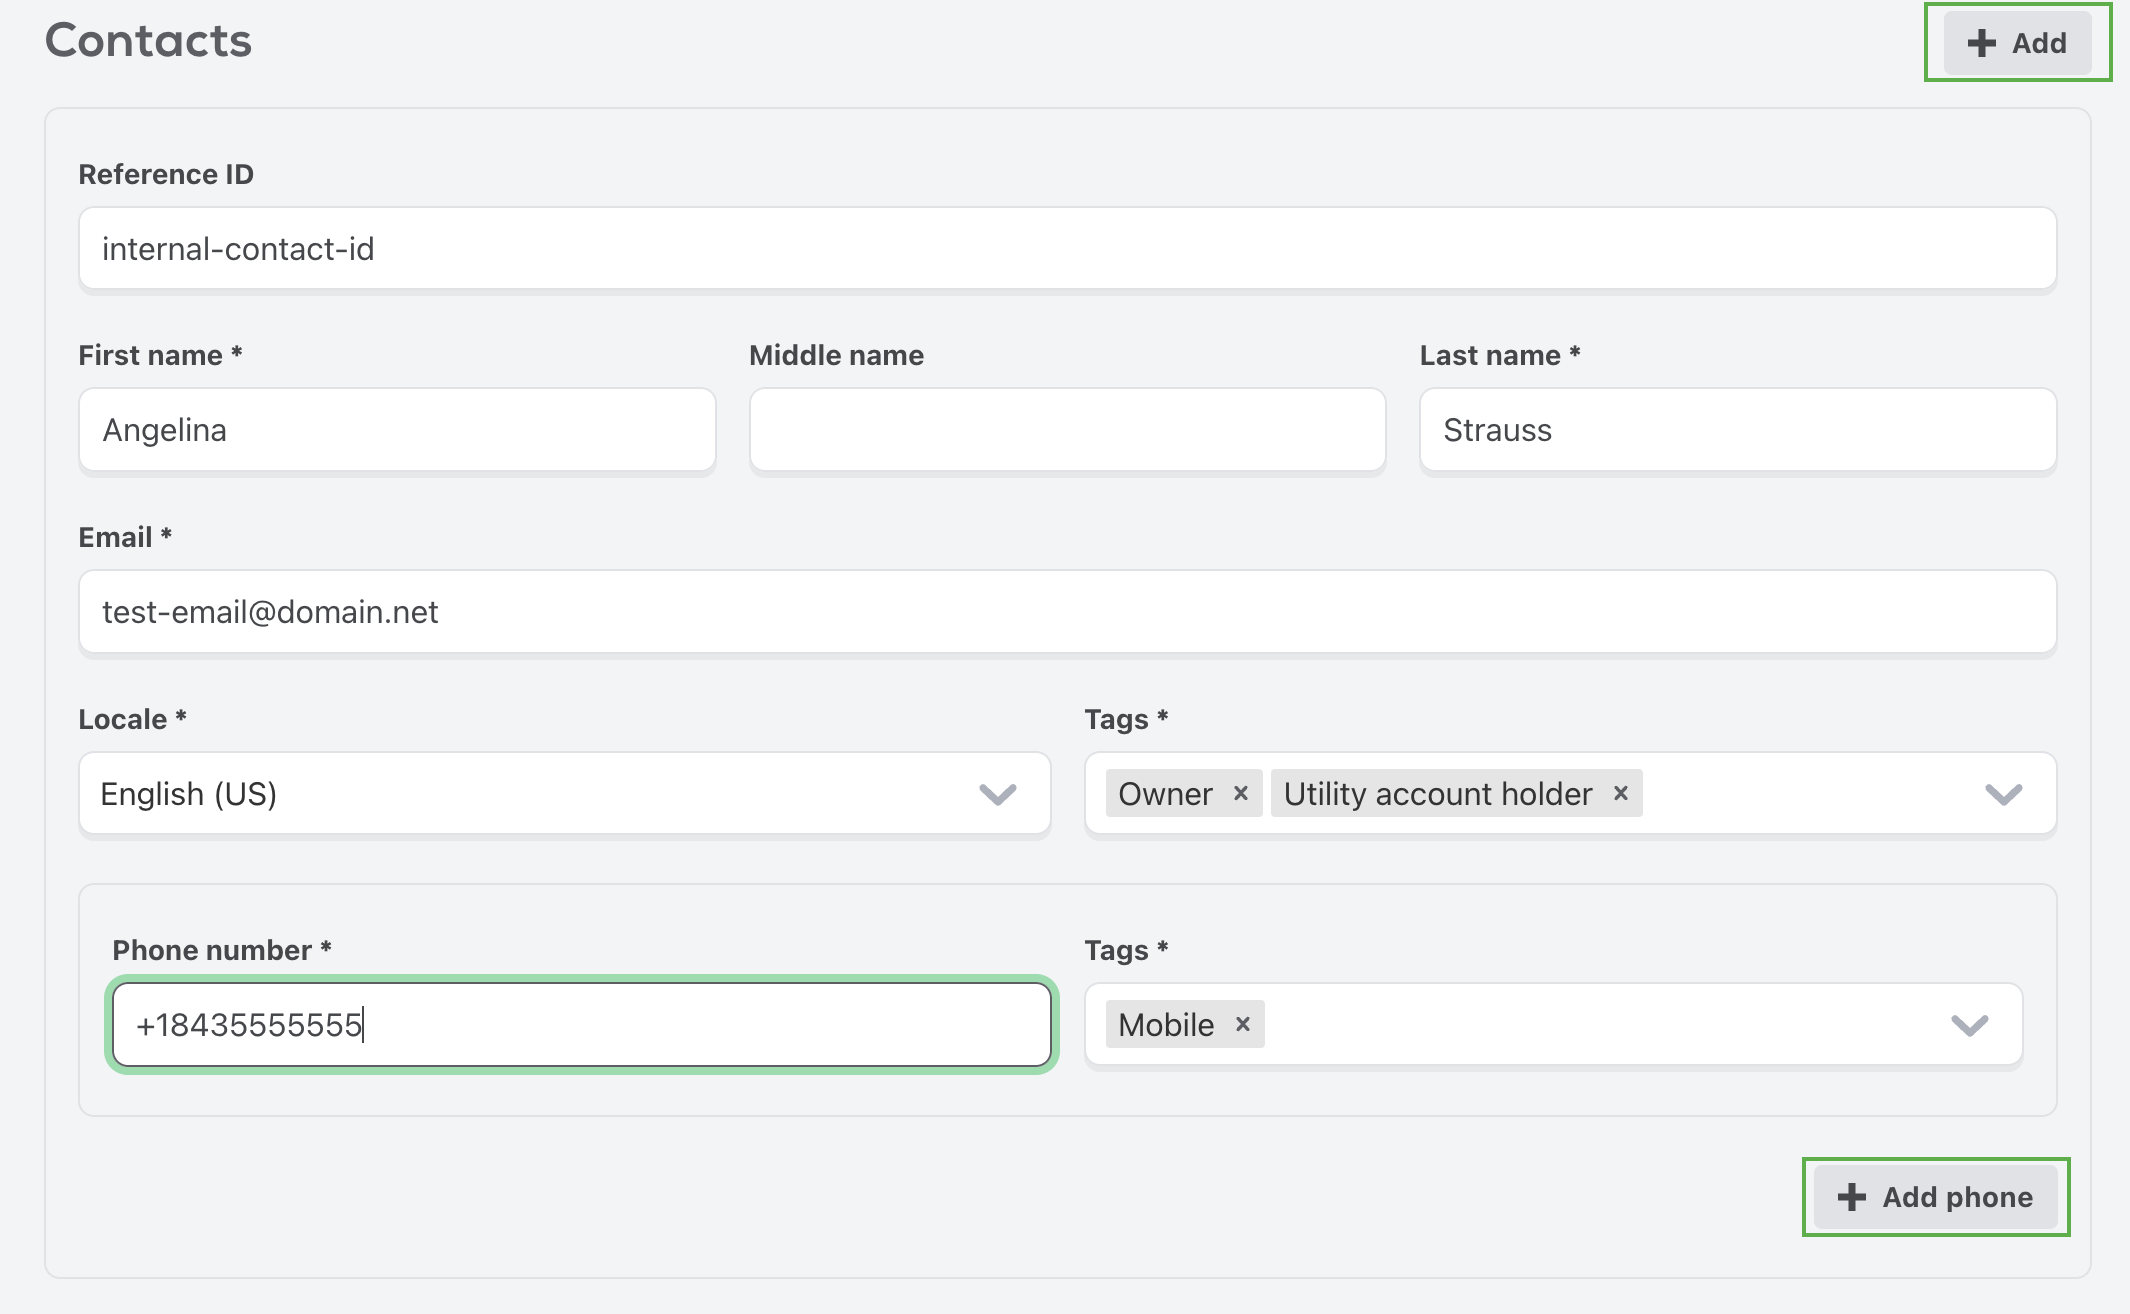
The Contacts section gathers all of the contact information for the homeowners. You can add another contact using the + Add button. You may need additional contacts if there is a coborrower for the loan, or if the utility account holder is not the primary contact. You can make use of Tags to indicate the roles of each contact.
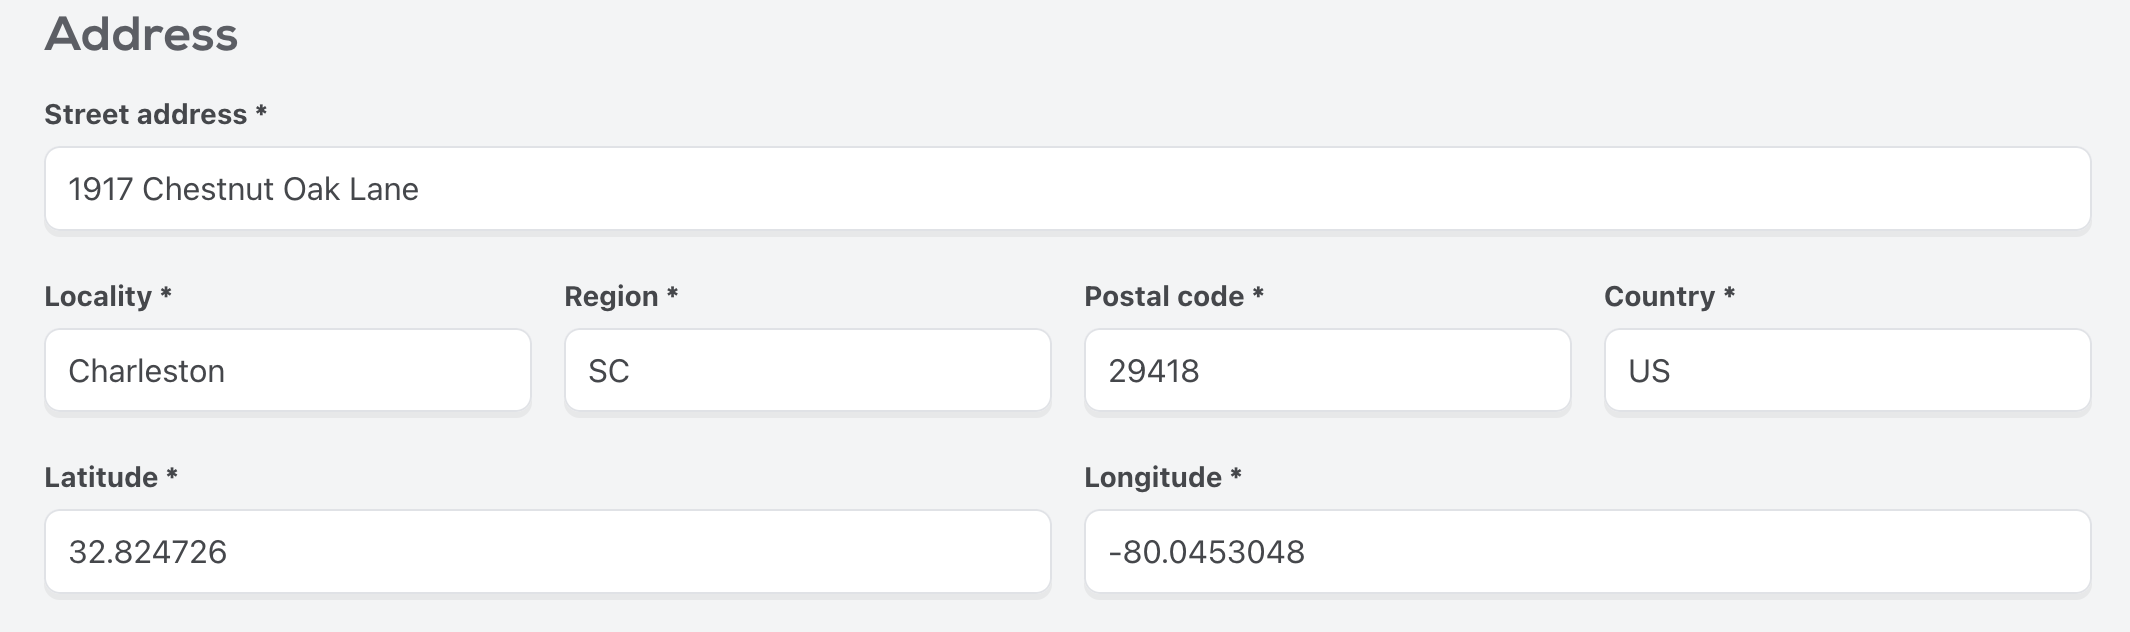
The Address section captures the address of the property where the system is being installed. You’ll need the latitude and longitude of the property. You can get this via google maps, or by using the geography API.
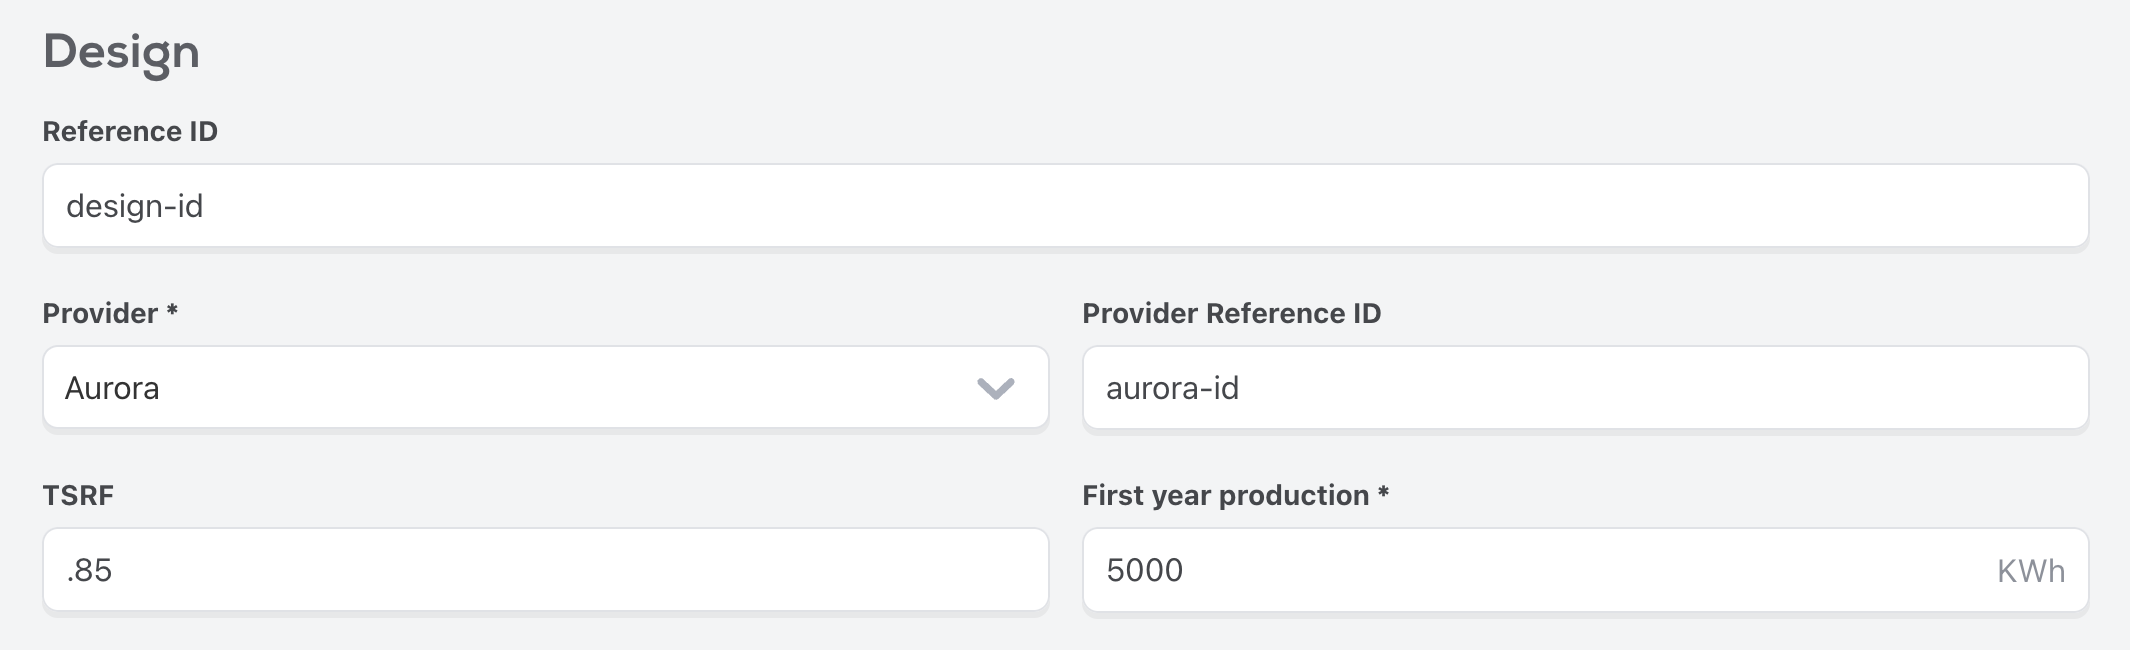
The Design section serves to collect details about the solar system.
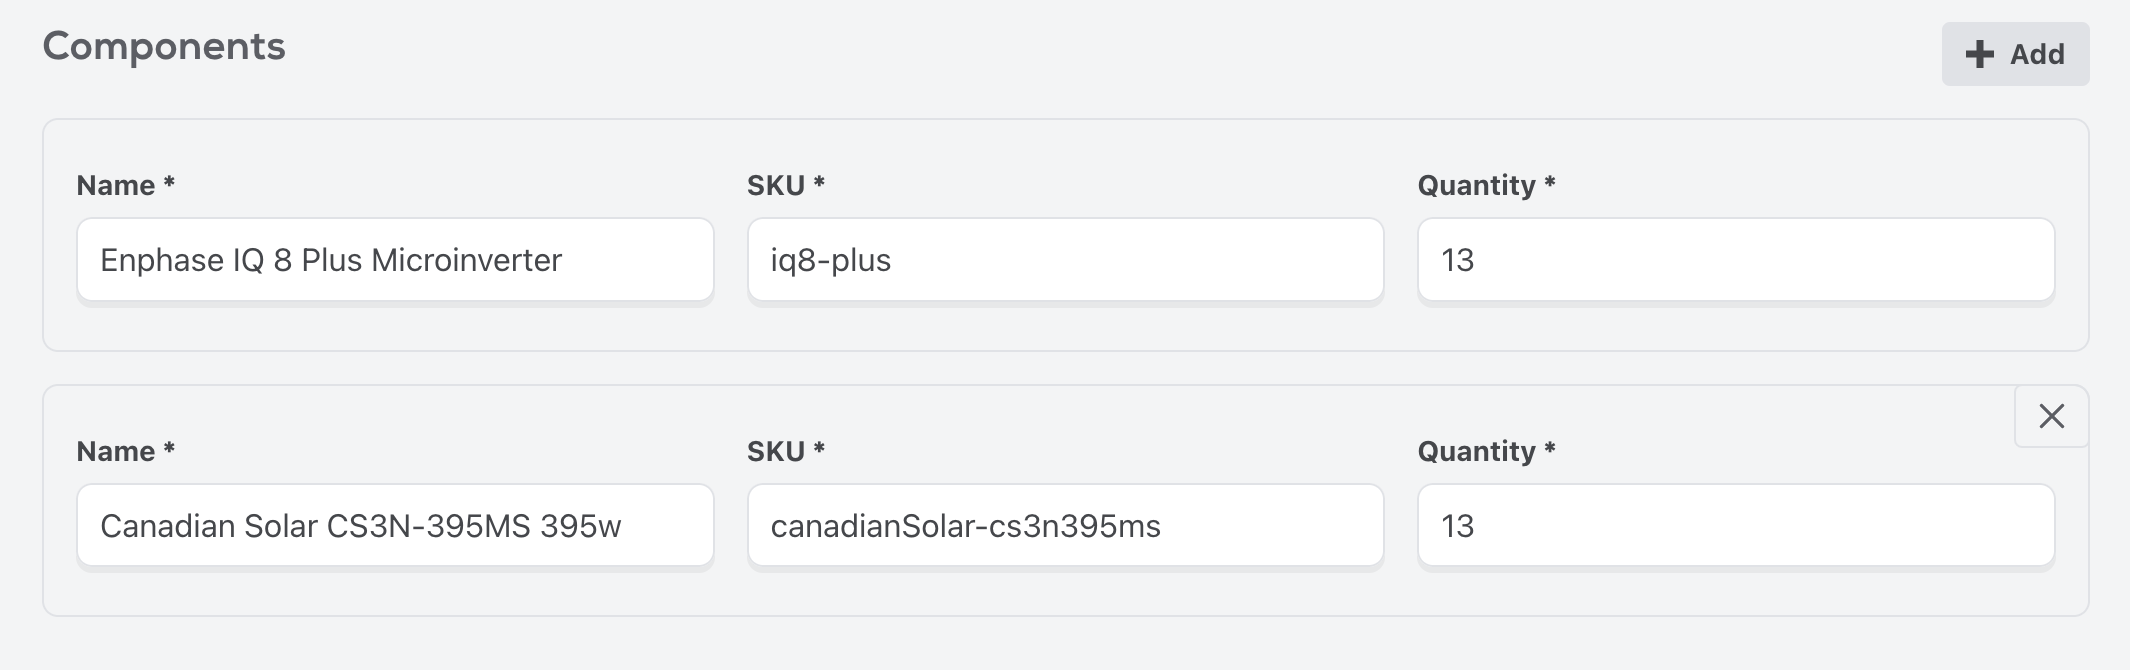
Each design consists of components. These are the inverters, panels, and so on that comprise the solar system. You can find the various components that Palmetto supports using the Products API.
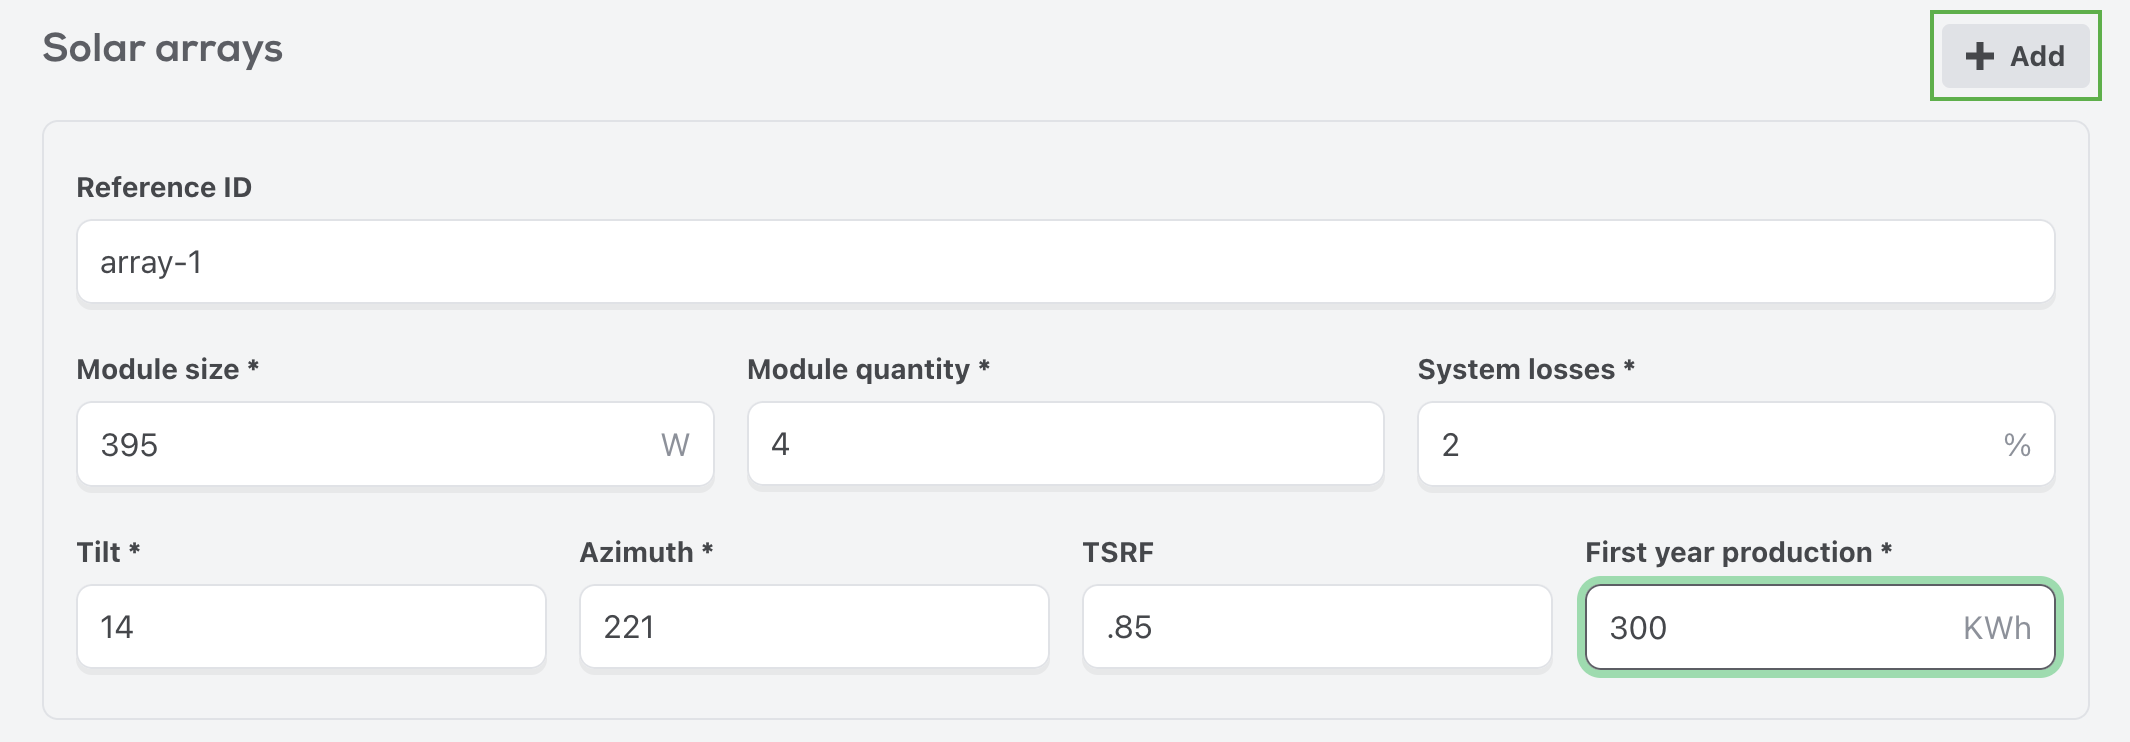
You’ll also need to add the solar arrays that comprise the solar system design. You can add multiple arrays with the + Add button.
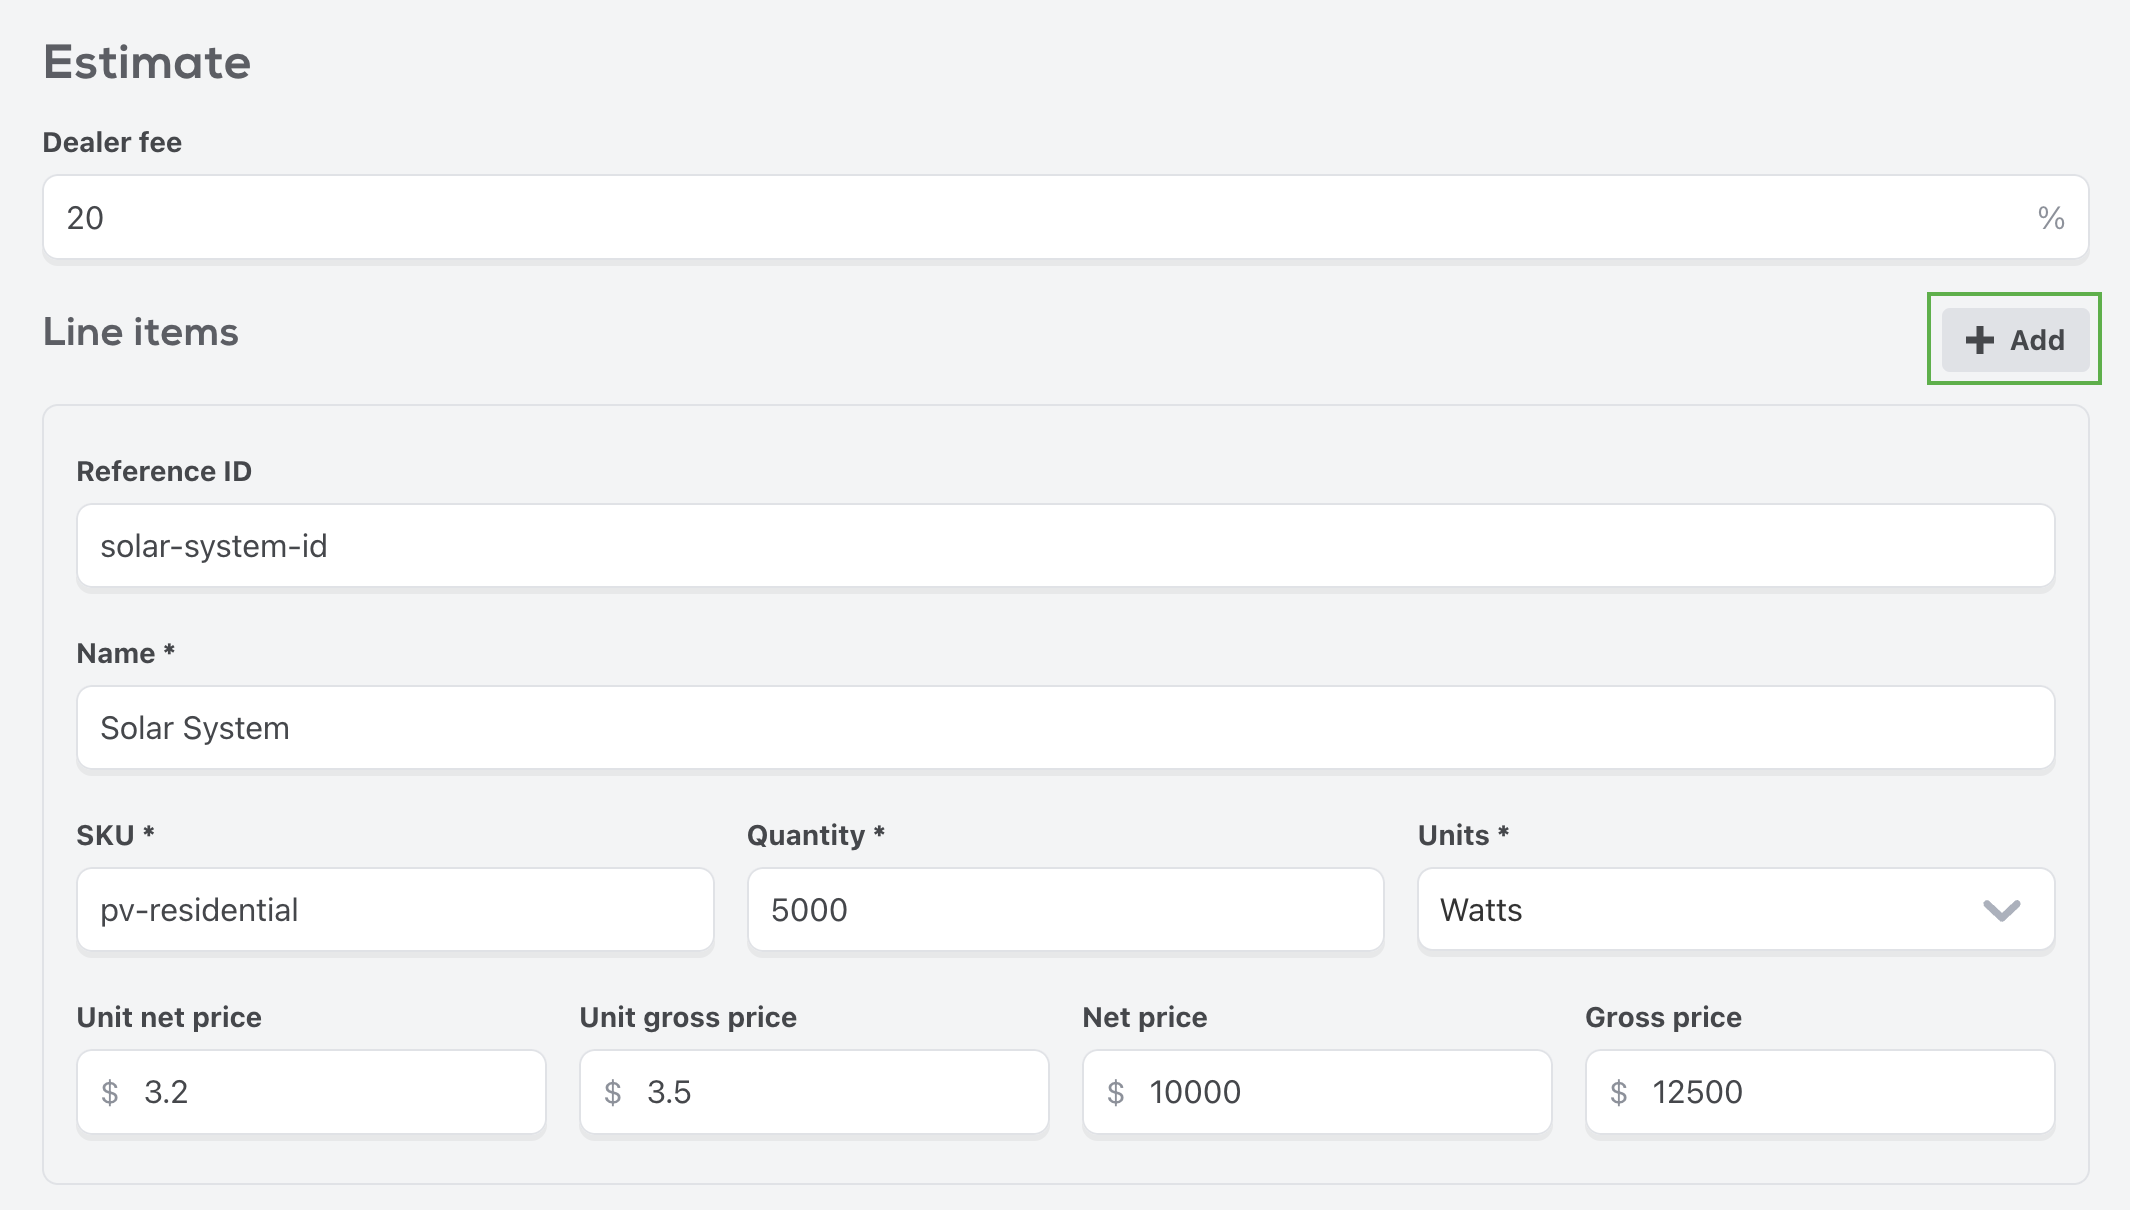
The Estimate section outlines all of the pricing and line items that make up the project, including the solar system itself and any add-ons. You can add as many line items as you wish with the + Add button.
The Payment methods section captures details about the financing for the project. You will need to provide a reference id for whichever financier is financing the project. You can add multiple payment methods if need be using the + Add button.
| Financier | Reference Id |
|---|---|
PALMETTO | Account Id |
GOODLEAP | Loan Id |
ROCKET | Loan Id |
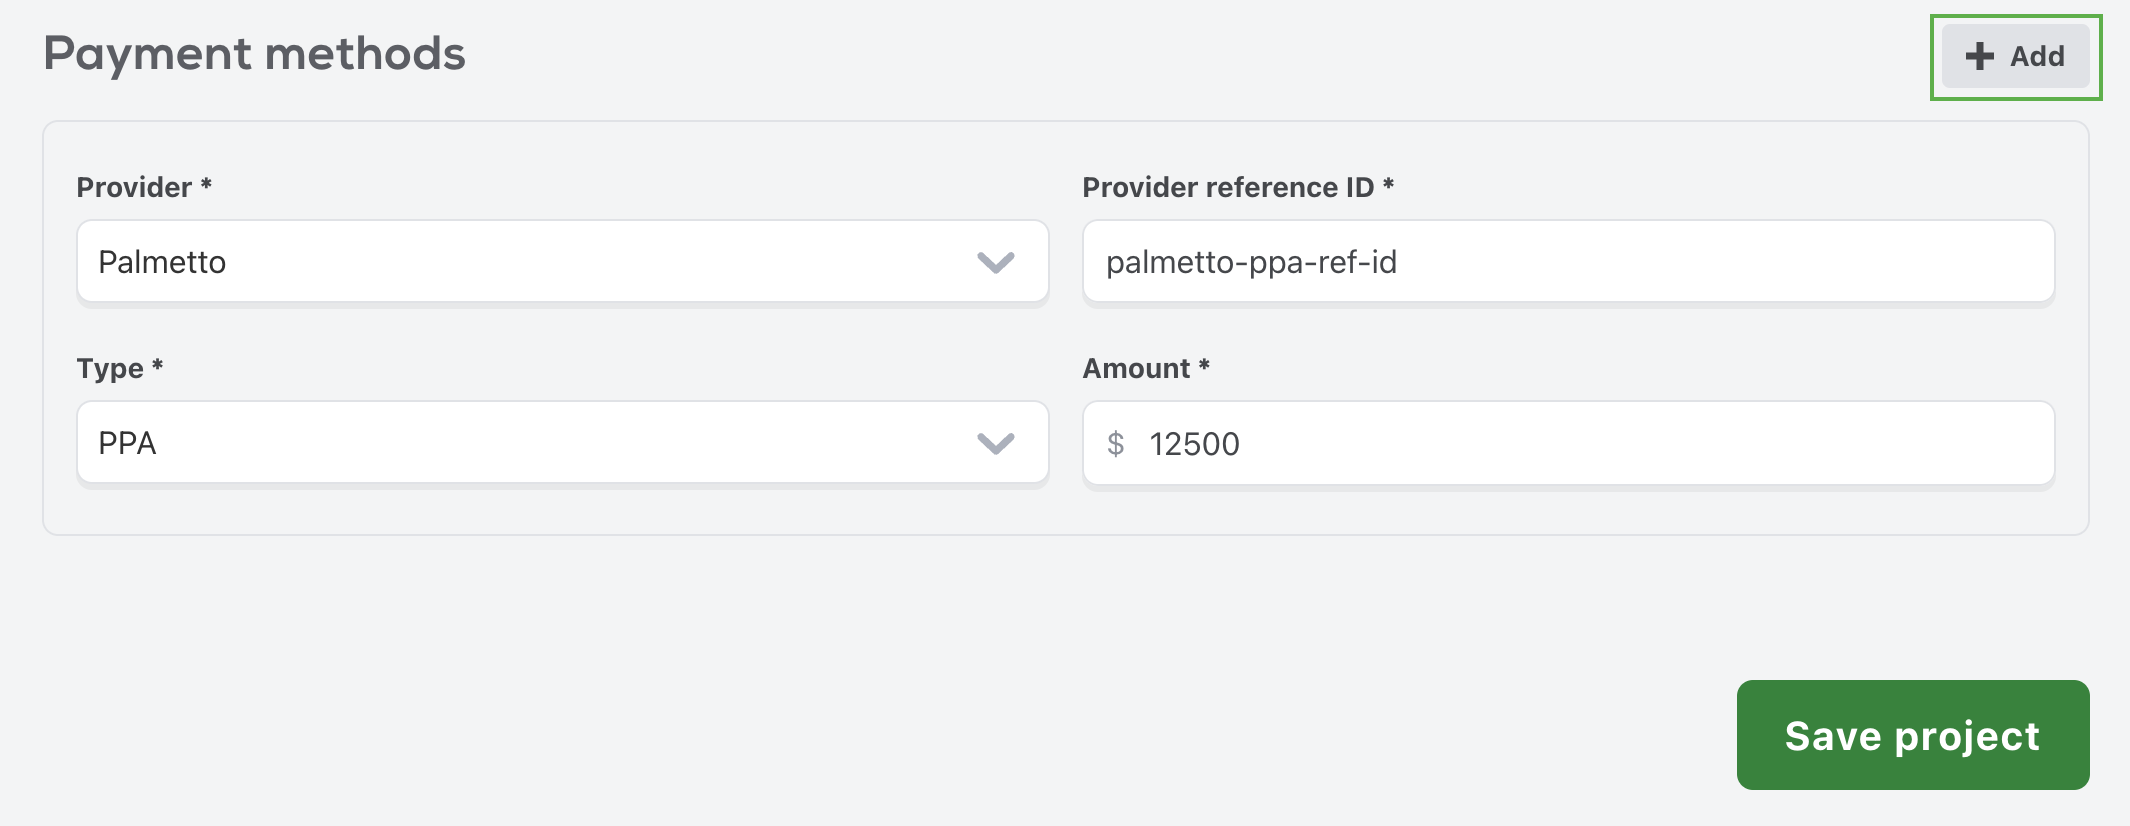
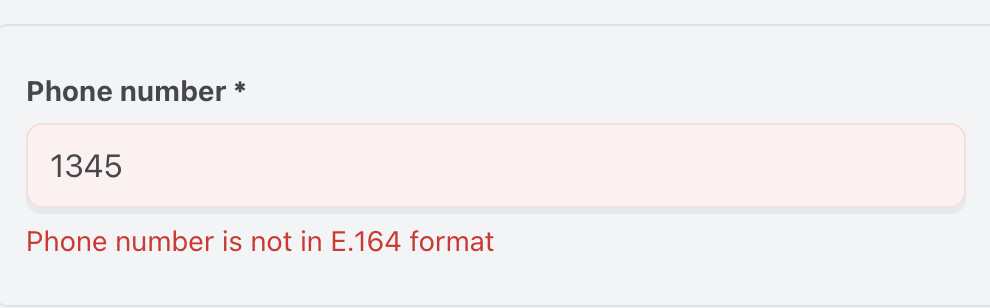
When all of the fields have been filled out, use the Save project button to save your project. If there are any issues with the data entered, those will appear underneath the field with the error.
Upload documents
Section titled “Upload documents”After a project is created you will need to upload documents. There are three types of required document types, DESIGN, HIC, and UTILITY_BILL, and you must have at least one of each type that has
at least one file. Each Document is made up of one or more files, that are uploaded using a multipart/form-data request. There is also an additional MISCELLANEOUS type that can be used to upload
any additional supporting documents.
Request
Section titled “Request”import fetch from 'node-fetch';import FormData from 'form-data';import fs from 'fs';
const data = FormData();data.append('type', 'HIC');data.append('file[1]', fs.createReadStream('file.jpg'));data.append('file[2]', fs.createReadStream('anotherFile.jpg'));
const response = await fetch(`${envBaseUrl}/api/projects/${projectId}/documents`, { method: 'POST', headers: { Authorization: `Bearer ${accessToken}`, }, body: data,});
const result = await response.json();Response
Section titled “Response”{ id: '64d9aa7a3eb77429f9e4e902', type: 'HIC', archived: false, files: [ { contentType: 'image/jpeg', originalName: 'file.jpg', md5Hash: 'nZwbJzLOngS+2QHrRXs7/w==', sizeKB: 6067.8, viewUrls: [{ type: 'ORIGINAL', URL: '...' }] } ]}Reference: Project Documents API
In the portal
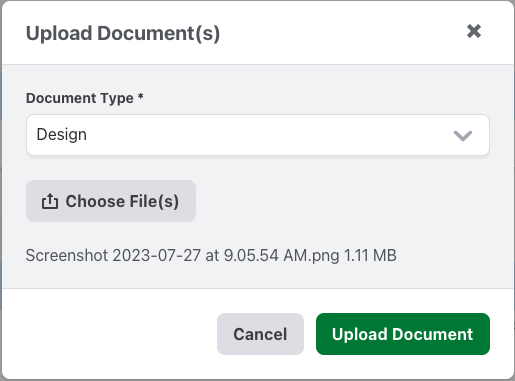
Section titled “In the portal”You can manage uploads for a project under the Documents section. To upload a document, select the Upload button.
 Select the
 Document Type for the document you’re uploading, and choose the files. You may upload the documents as a single file with multiple pages, or as individual files.
The uploaded files will display under the Documents section. You can view the status and the files you uploaded for each document type.

Submit a project
Section titled “Submit a project”Once you have created a project, added all the required information, and uploaded the supporting documents, you can submit the project for acceptance.
Request
Section titled “Request”import fetch from 'node-fetch';
const response = await fetch(`${envBaseUrl}/api/projects/${projectId}/submission`, { method: 'PUT', headers: { Accept: 'application/json', Authorization: `Bearer ${accessToken}`, },});
const result = await response.json();Response
Section titled “Response”{ "status": "PENDING", "submittedAt": "2023-08-05T22:11:39.181Z"}Reference: Project Submit API
In the portal
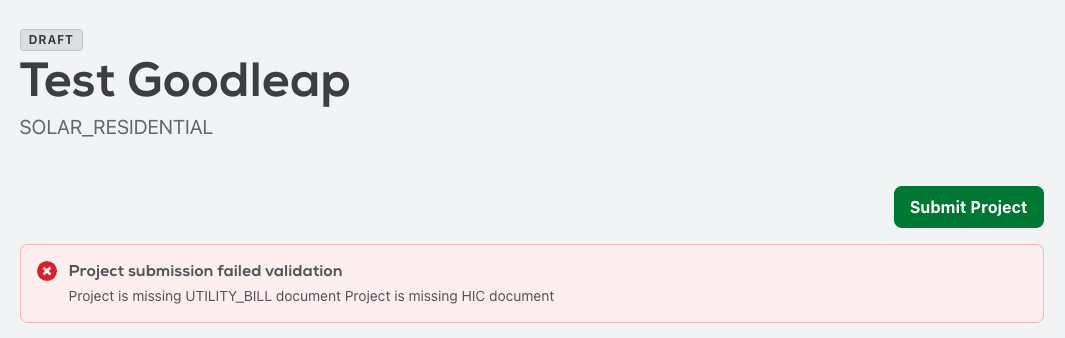
Section titled “In the portal”You can submit a project in the portal using the Submit Project button at the top of the project detail page.
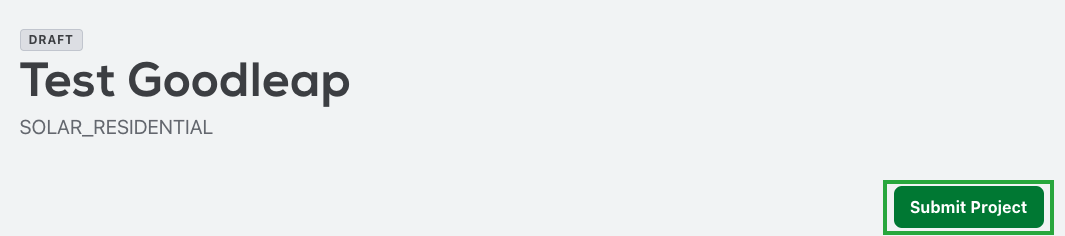
If there are any issues with the project you are submitting, an error will display with the problem areas. You can address the issues and try submitting again.
Next Steps
Section titled “Next Steps”After a project has been submitted our team will review it and choose to either accept or reject the project. Projects are rejected for a variety of reasons but some examples would be that is is not a viable solar system or the address is outside of a service area. If your project is rejected you can make changes and then re-submit the project.
You will be notified via webhook events or you may also choose to poll using the project status endpoint.